
Paint a Picture of a Campfire
You can paint a picture of a campfire in a few easy steps. This beginner acrylic painting tutorial is perfect for beginners or kids to try! Painting a picture of a campfire is a fun summer painting to try with your group of friends. Learn how to paint a picture of a campfire below!
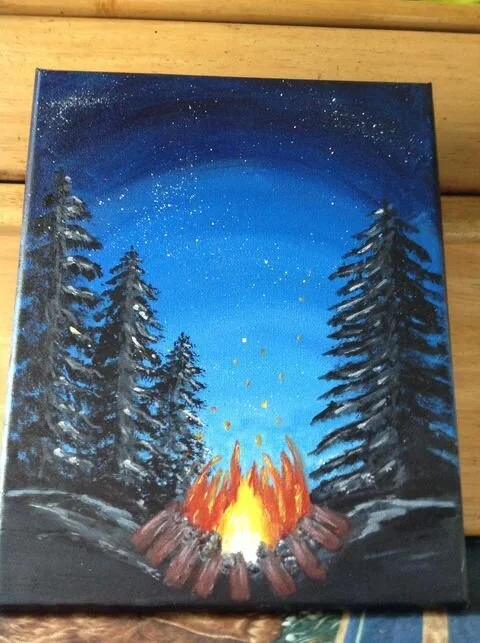
Picture of a Campfire
Learn beginner acrylic painting techniques and Let’s paint a campfire! (Painting Video Lesson is recommended for ages 7 and up!) In this video you will learn about colour mixing, painting highlights and shadows, how to paint trees, how to blend paint colours, how to paint fire and more! This video is perfect for children or adults who are new to acrylic painting.
Campfire Painting Materials:
-titanium white, mars black, cobalt blue (or ultramarine), cadmium yellow, cadmium red
- A medium round brush (mine is size 6)
-a very small round brush for details
- a 1 or two inch flat brush
- an old rag
-container for water
-re-sealable plastic palette
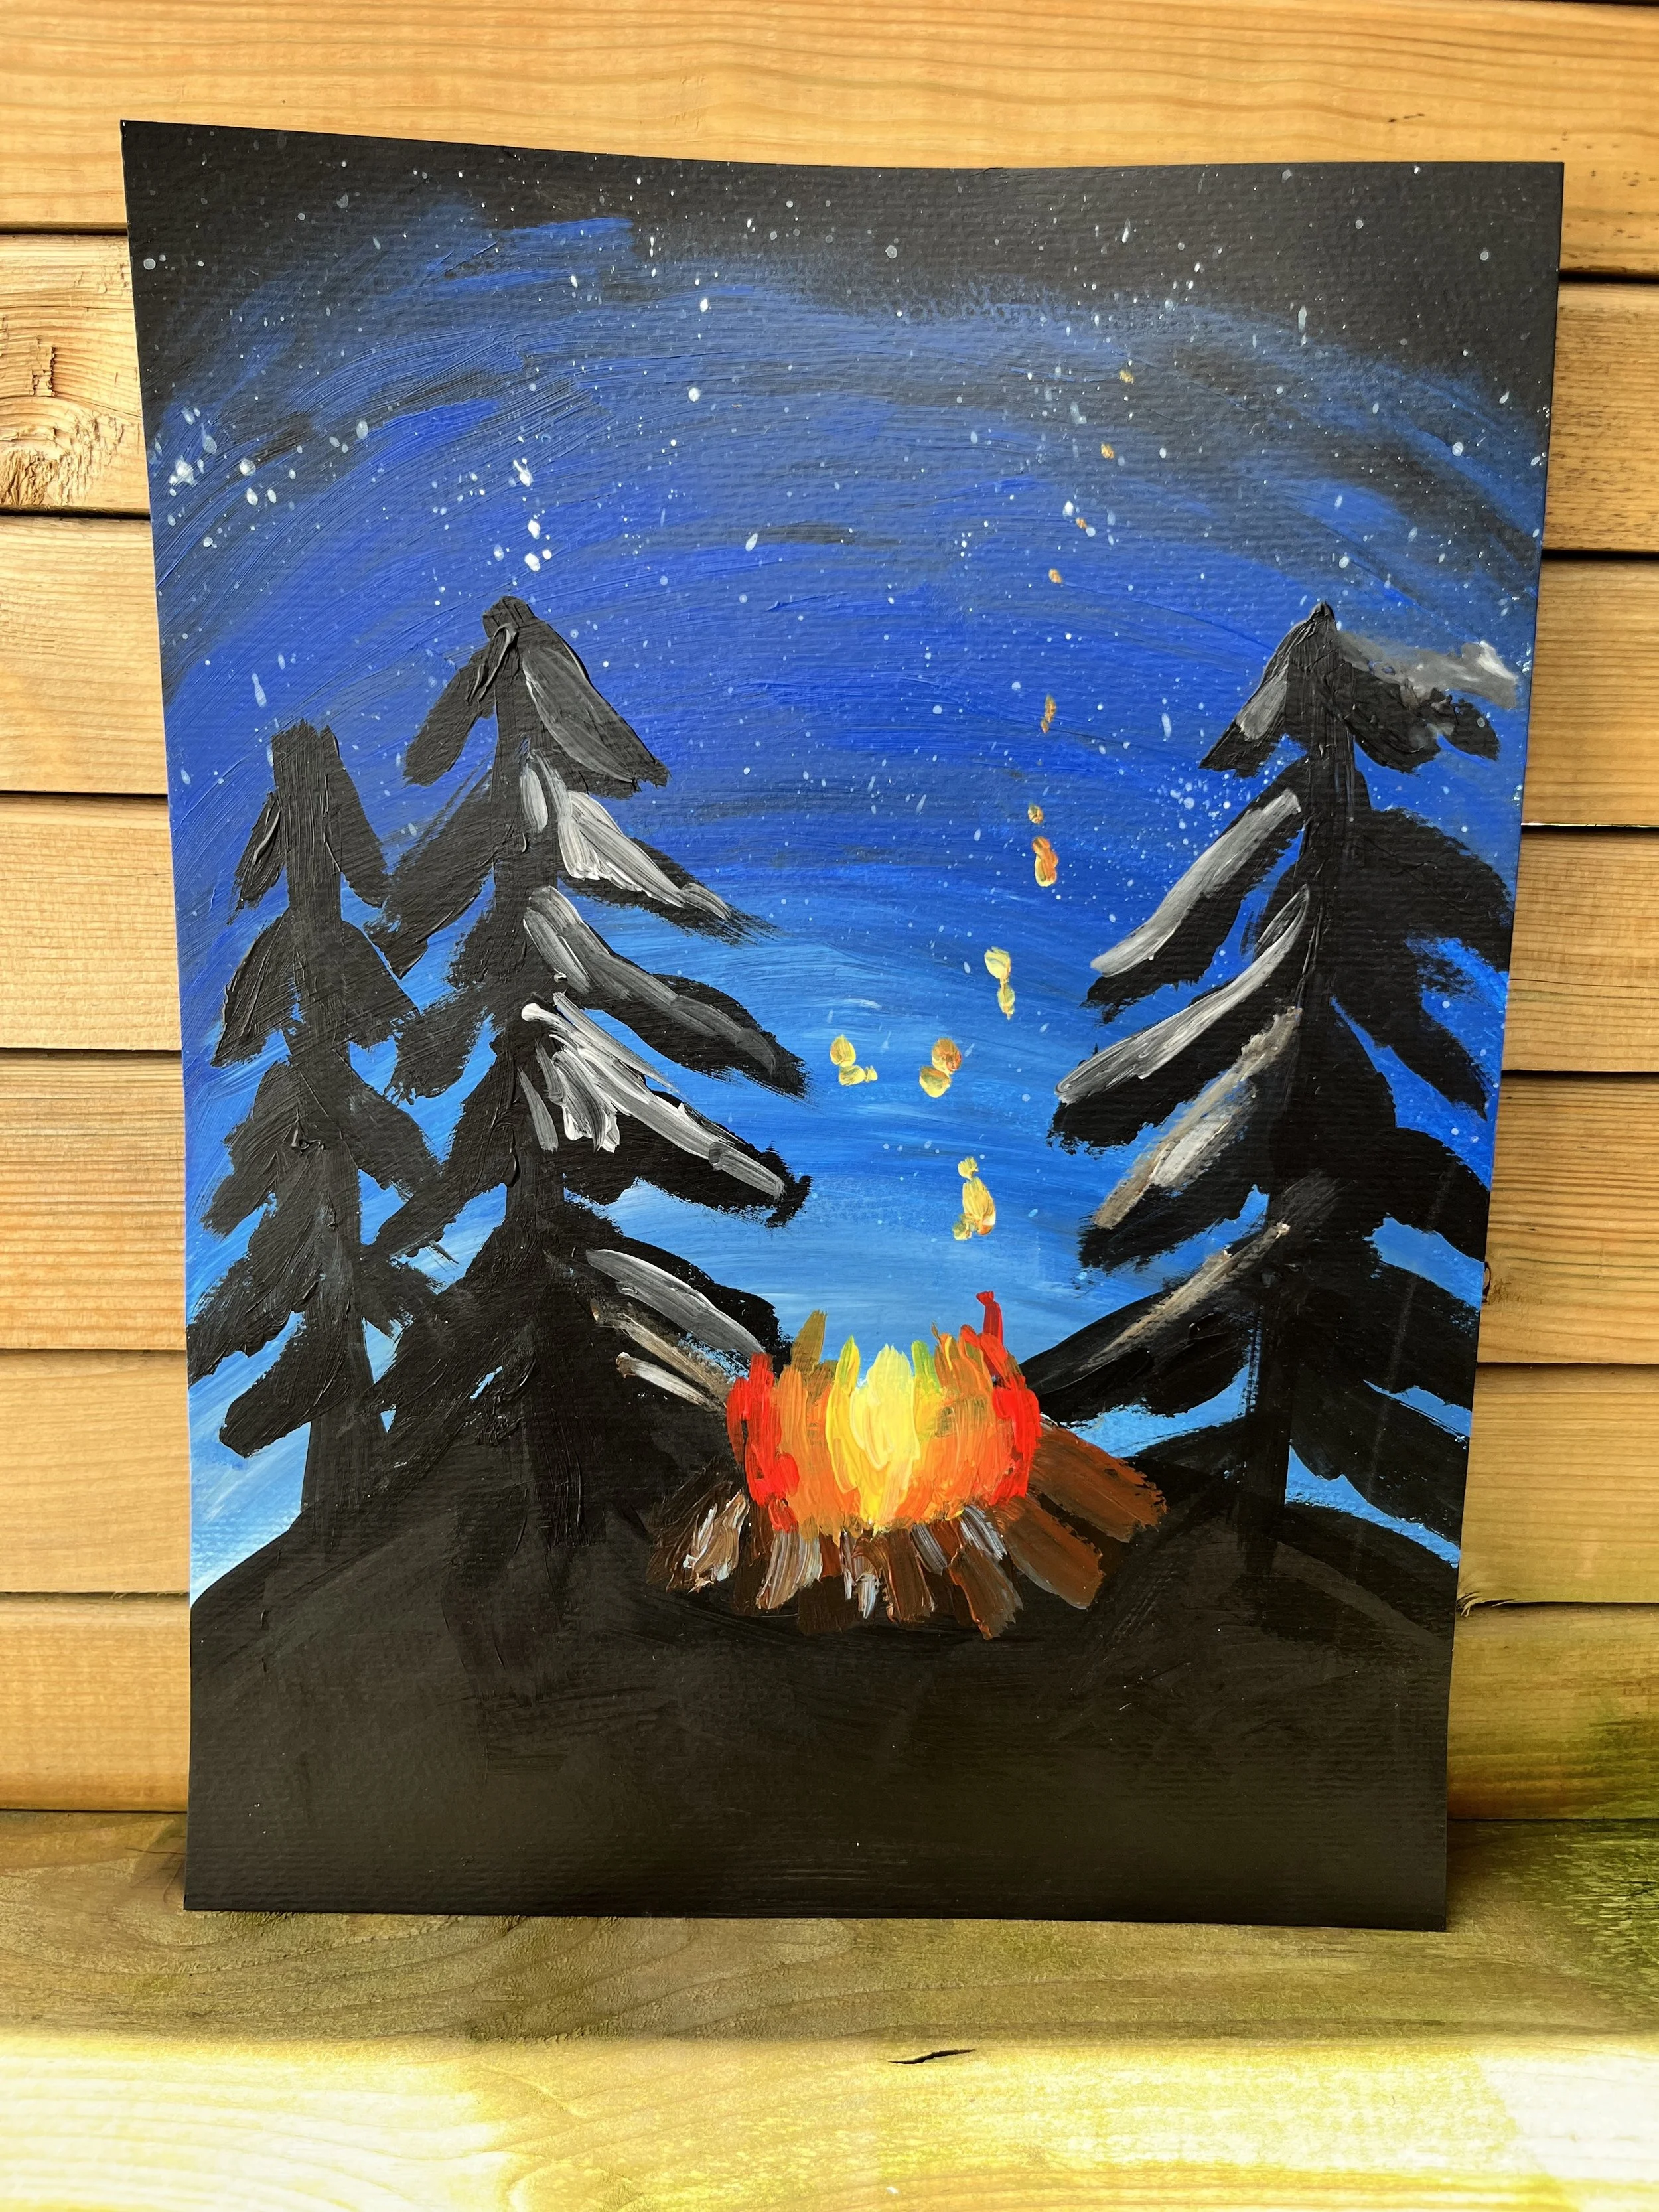
This is a campfire painting done by someone who took my tutorial on YouTube!
Click the link to download your FREE guide to become a better acrylic painter!
Paint a Picture of a Campfire Steps:
Step 1 - Paint the Background
Begin by painting the sky and mixing cobalt blue with mars black. You can paint the dark blue so it is a third of the way down the canvas. Make sure to paint a couple of coats of the sky and paint around the edges of the canvas.
You can paint some starts by adding some white paint and a little bit of water to your detail brush. Then you can pull back the bristles to create a splatter of stars on the sky. If you are not happy with the stars or if a blob forms you can dab it off with your rag or paint over it with your sky colour.
Then you can mix in some straight cobalt blue, blending it on top of the dark blue for a few inches and then mixing in a light blue with white and cobalt blue. You can leave one third of the canvas unpainted at the bottom of the canvas.
I painted the sky in an arch with curved lines to highlight the campfire in the centre of the painting.
Then for the bottom third of the canvas you can paint it black for the ground. You can leave some space in the centre of the canvas as a dip for where the campfire will be.

Other campfire paintings done by kids who have taken this tutorial!
Step 2 - Paint the Trees
Next you can paint the trees that will frame your campfire. You can decide how many trees you would like to paint and how tall you would like to paint them. When you are painting trees you want to make sure you are adding variety. Don’t paint trees perfectly or symmetrically. Don’t paint all the trees the same height because that is not realistic.
Begin by using your round number 6 brush and painting a vertical line of black paint for the trunk of the tree. You can also map this out in chalk if you would like. Then starting at the top of the tree you can jiggle your brush with black paint for the branches. It helps to look at a picture of a tree. The branches will be smaller at the top of the tree and shorter. Towards the bottom of the tree the branches will be longer and more full with less gaps in them.
Step 3 - Paint the Highlights
Mixing different greys by adding some white to your black you can begin to paint the highlights on the tree. You can download my free resource on mixing green and grey here. You want to add highlights on the branches that are going to be the closest to your light source, the campfire.
Step 4- Paint a Picture of a Campfire
You can start by mixing some brown by mixing all the primary colours together. Then you can paint in the logs with your number 6 round brush. You can position the logs so there is space for the flames in the centre of the fire. Then you can switch to a round detail brush and paint the flames. You can start by painting short red strokes on the outside of the fire and then add orange, yellow and light yellow by mixing yellow and white. The light yellow, the hottest part of the fire should be on the inside of the campfire. You can layer the different colours of flames on top of each other. Then you can paint some of the ashes by mixing different yellows, oranges and reds and add a mixture of those colours on your detailed brush. Dab the paint off onto the sky by spacing out the ashes randomly. Some of the ashes can be smaller or larger than others.
To watch the video tutorial of painting a picture of a campfire click on the video below. Be sure to subscribe to my YouTube channel so you don’t miss out on new painting videos!

